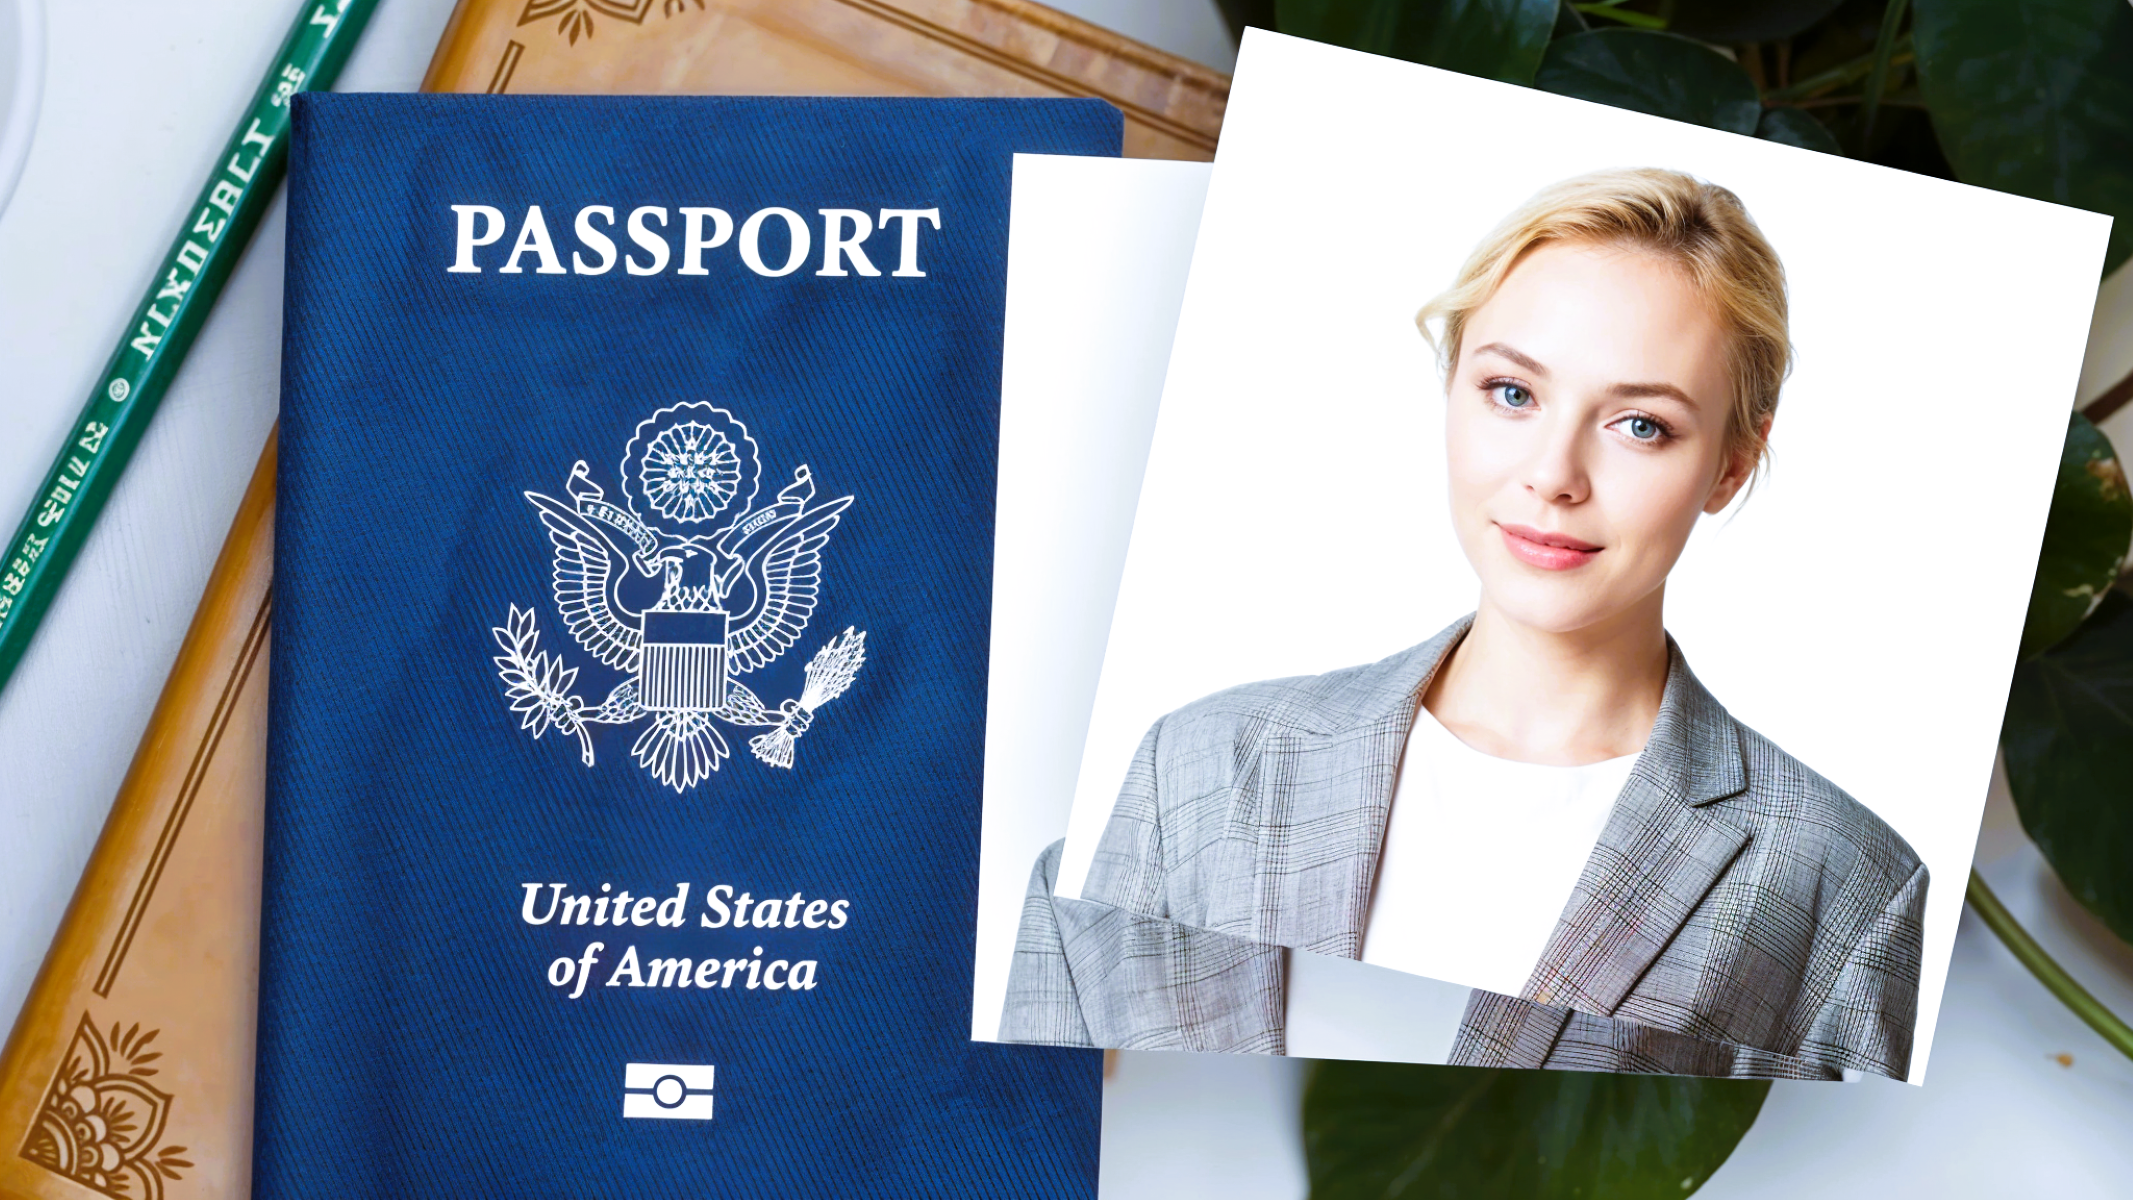
Before embarking on your international journey, there’s one essential task that needs your immediate attention: getting the perfect passport photo. As simple as it may seem, the US passport photo requirements are strict, and failing to meet them could lead to unnecessary delays and frustration in your travel plans.
Why Are Passport Photos Important
The Role of Passport Photos in Your Travel
Passport photos are a vital component of your identification when traveling internationally. These photos are not merely for documentation purposes; they serve as a key element in verifying your identity. When you submit a passport application, your photo is matched with your personal details, such as name, birthdate, and citizenship status, allowing authorities to confirm that the passport belongs to you. This is especially crucial when passing through border control, customs, or security checkpoints, as your photo helps to authenticate your identity. Without a valid passport photo that meets the required standards, your travel could be delayed or even prohibited.
Moreover, passport photos are used worldwide to protect against identity theft and fraud. Governments need to ensure that passport holders are indeed who they claim to be. Your photo plays an essential role in securing not only your personal information but also the safety of the global travel system. Whether you’re heading on a vacation, business trip, or even traveling for immigration purposes, the passport photo acts as your travel “ID card.” It’s your first line of defense against impersonation and ensures that you and your personal data are protected at every border you cross.
Key U.S. Passport Photo Requirements
General Size and Dimensions
When it comes to U.S. passport photos, one of the most crucial requirements is the exact size and dimensions. The photo must be precisely 2 inches by 2 inches (51mm x 51mm). This specific size ensures that your photo fits correctly into the passport and complies with government standards. Here are the important points regarding size:
- Exact Dimensions: The photo must measure 2 inches by 2 inches. Even a slight variation in size can result in your photo being rejected. It’s essential to measure carefully before submission.
- Head Size: The face in the photo must occupy about 50% to 69% of the total height. Typically, this means your head should be about 1 inch to 1 3/8 inches from the chin to the top of the hair.
- No Alteration: The photo must not be resized or digitally altered in any way. It must be a clear, original image that accurately represents your facial features.
These exact measurements are non-negotiable, as they are in place to maintain consistency and security in identifying passport holders.
Background and Lighting Requirements
The background and lighting of your passport photo play a key role in meeting the required standards. Here are the important guidelines to follow:
- Background Color: The background must be plain, white or off-white. It should have no textures, patterns, or objects that could distract from your face. This clean background helps ensure that your face is the focal point of the photo.
- Avoid Shadows and Reflections: Shadows on your face or background can make the photo invalid. Ensure the lighting is even and there are no shadows on your face, background, or behind you.
- Proper Lighting: Proper lighting is crucial to avoid overexposure or dark spots. The light should be soft and even, with no harsh light sources creating unwanted reflections or glares, especially on glasses or the skin.
In short, the background should be neutral, and lighting should be balanced to keep your face visible and clearly identifiable. Proper lighting and background contribute significantly to the overall quality and acceptability of your passport photo.
Facial Expression and Head Position
For U.S. passport photos, it’s vital to follow the guidelines regarding facial expression and head position. These rules ensure that the image represents you as clearly and accurately as possible:
- Neutral Expression: You must have a neutral facial expression. This means no smiling, frowning, or raised eyebrows. Keep your mouth closed and avoid exaggerated expressions. A relaxed, calm look is ideal.
- Eyes Open and Visible: Your eyes should be open and clearly visible. This is crucial for identification purposes. Blinking or squinting is not allowed, and you should look directly at the camera.
- Head Position: Your head must be facing the camera directly, with no tilting or turning. It’s important that your head is centered in the frame and that your facial features are fully visible. Your chin should be level, and your head should occupy the center of the photo.
- No Obstructions: Make sure that nothing covers your face, such as hair or accessories, unless required for religious purposes. Your face should be unobstructed for clear identification.
By adhering to these facial expression and head positioning guidelines, you’ll ensure that your photo is compliant with U.S. passport requirements, allowing for smooth processing and identification.
Common Mistakes to Avoid in Passport Photos
Wearing the Wrong Clothing or Accessories
When preparing for a passport photo, it’s crucial to avoid wearing clothing or accessories that could obstruct your face. Certain items, such as hats, sunglasses, or scarves, are generally prohibited in passport photos. These items can obscure facial features and hinder the photo’s effectiveness for identification purposes. However, exceptions exist for religious headwear, provided that it doesn’t obscure your face. Here are some common mistakes related to clothing and accessories:
| Mistake | Description | How to Avoid It |
| Wearing Hats | Hats can hide your face, especially your forehead and eyes. | Avoid wearing any hats unless it’s for religious purposes. |
| Sunglasses | Sunglasses obstruct your eyes, a key part of your identity. | Take off sunglasses before taking the photo. |
| Excessive Jewelry | Large jewelry can block parts of your face. | Keep jewelry minimal to avoid covering important features. |
| Clothing with Patterns | Patterns or bright colors can distract from your face. | Opt for solid, neutral-colored clothing to keep the focus on you. |
Avoid wearing anything that could make the photo unclear or difficult to process. Focus on simple, neutral clothing and avoid distractions to ensure your face remains the focus of the image.
Lighting Issues
Proper lighting is essential to ensure your passport photo meets the necessary standards. Poor lighting can create shadows or reflections that may obscure your face or distort its features. These issues can lead to rejection, as the image must be clear and accurate for identification purposes. To prevent this, ensure you take your photo in a well-lit environment, and follow these tips:
| Mistake | Description | How to Avoid It |
| Harsh Lighting | Direct sunlight or strong artificial light can cause glares or shadows. | Use soft, diffused lighting for an even glow. |
| Uneven Lighting | One side of the face may be darker than the other, affecting visibility. | Use multiple light sources to ensure balanced lighting. |
| Overexposure | Too much light can wash out facial features. | Keep light sources at a distance to avoid overexposure. |
| Shadows on the Face | Shadows can obscure key facial features, such as your eyes or chin. | Avoid standing directly in front of light sources; diffuse the light. |
To achieve the best lighting, you can place light sources on both sides of your face, ensuring even coverage. Make sure there are no harsh shadows cast by your surroundings, as these can make the image unusable for passport purposes.
How to Take a U.S. Passport Photo at Home
Set Up Proper Lighting
Taking your passport photo at home requires careful attention to lighting. To ensure that the photo meets all the necessary requirements, it is crucial that the lighting is even across your face. Start by choosing a well-lit area where there is enough light to illuminate your face without causing harsh shadows. Avoid direct sunlight or standing too close to any strong light source, as it can cause overexposure, resulting in a poor photo. Instead, aim for soft, diffused light that provides a natural, even effect across your face. Natural light from windows can be perfect, but you can also use lamps or artificial light sources to create this effect.
To achieve balanced lighting, you can place two light sources on either side of your face, at a slight angle, to ensure that no shadow is cast. This will make sure both sides of your face are illuminated properly. Keep in mind that shadows on your face, especially around the eyes or under the chin, are not acceptable. The goal is to have a clear, evenly lit image that allows your facial features to be easily visible without any distractions or distortions.
Use a High-Quality Camera
When taking your passport photo at home, it is important to use a high-quality camera. While a professional camera is ideal, many modern smartphones have the capability to capture clear, sharp images that meet passport standards. The key is to ensure that the camera is set to the highest resolution, and that the photo is in focus. Blurry or pixelated photos will be rejected, as the clarity of your face is paramount for identification purposes. If you’re unsure of your phone’s camera settings, consider using a tripod or a stable surface to keep the camera steady while taking the photo.
If possible, ask a friend to take the photo for you, ensuring that the camera is positioned at the correct height and angle. The camera should be at eye level so that your face appears natural and centered in the frame. It’s also important to avoid using filters or editing the image afterward, as any alterations can cause your photo to be invalid. Ensure that the image is crisp, clear, and without any distortions, making sure all facial features are easily identifiable.
Position Your Head Correctly
Getting the right head position is essential when taking a U.S. passport photo. Your head should be positioned straight and centered in the frame. To achieve this, ensure that your face is looking directly at the camera with no tilting of the head or turning to the side. The top of your head should be aligned with the top edge of the photo, and your face should occupy about 50-69% of the height of the image. This means that from the chin to the top of your head, the distance should be between 1 inch to 1 3/8 inches.
Proper head positioning is crucial for identification purposes. If your head is tilted or off-center, it may result in a photo that is not aligned with the passport standards. Take a moment to check your head position and ensure that it is straight and centered in the frame before taking the shot. This will help to avoid unnecessary rejections and guarantee that your photo meets the required criteria for U.S. passport applications.